Select Language:
Kingdom Come: Deliverance 2 – Miri Fajta Side Quest Guide
In Kingdom Come: Deliverance 2, there’s an intriguing side quest called "Miri Fajta" set in the Trosky region, which players might easily overlook. This mission revolves around the protagonist, Henry, as he tries to resolve a family conflict. You can initiate it by speaking with Voivode at the Nomads’ camp.
Resolving the dispute is more complex than it appears. The quest has unexpected twists and tough decisions to make. There’s even a hidden ending that can be tricky to uncover. This guide will help you navigate the quest for the best outcome.
Starting the Miri Fajta Quest
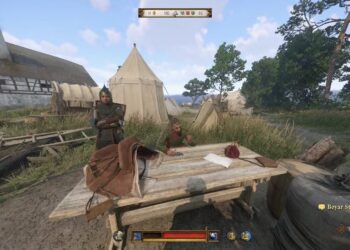
To kick off this engaging early-game quest, head to the Nomads’ camp, situated to the west of the Trosky region near a lake. Once you’re there, find Voivode, who will inform you about his missing daughter, Marika.
You can also speak to Marika’s mother, Aranka. Make sure to explore all dialogue options to boost your scholarship skill level. After that, search Marika’s tent.
You won’t need to pick the lock on the difficult chest; simply grab the scarf lying nearby to complete this objective.
Finding Marika
After collecting the scarf, follow the map coordinates and speak with Bozhena. She will provide details about Marika’s probable location. Head to the marked area on your map.
A bit southwest of the A quest marker, you’ll find a trail of blood leading to a large rock. Move left, then right, and you’ll discover a cave on your left side. Marika will be in that cave, so make sure to chat with her.
She’ll ask you to retrieve her father’s amulet and some supplies for Bohush. To gather these items, return to the camp. Speak with Aranka for the supplies and then find Voivode to ask for the amulet.
However, Voivode will request that you rescue his son, Tibor, who has been captured by some villagers, and also give his other son a proper burial before he will hand over the amulet.
Rescuing Tibor
This part of the quest can be quite challenging, particularly because it can negatively impact your reputation in the village where Tibor is kept. Navigate to the search area, but proceed stealthily, as some zones are private.
Tibor is being held in a house situated adjacent to the barn in the southwest section of the search zone. Go into the village, take a right, and you’ll see the building you need to enter, but it’s unlikely you can just walk in. A hired hand is nearby who you can talk to, and you’ll face two skill checks: one for persuasion and another for intimidation, with persuasion being the better choice.
If your skill levels aren’t enough, there’s an alternative. Circle around the hut and notice a window. Climb through, untie Tibor, and follow him. Once you’ve taken a sufficient distance, talk to him; he’ll share news about his deceased brother.
Burying Gejza
Tibor will inform you where Gejza’s body is located. Navigate using the coordinates on your map. Upon arrival, speak to the woodcutter, who will guide you to the foreman, likely chopping wood nearby. You’ll need to utilize persuasion or intimidation skills here.
If successful, the foreman will allow you to take Gejza’s body. If not, stealth will be necessary. Look for the body tied to a tree on the northwest side. When the woodcutters aren’t paying attention, untie the body and carry it to the next marked coordinates. Once you are there, lay the body to rest in the grave, triggering a cutscene. After it’s over, return to Voivode regarding the amulet, but even after your efforts, he will still refuse to hand it over. Instead, he’ll demand the letter from King Sigismund, which Marika possesses.
Tip: Before searching for her, it’s best to gather the remaining supplies for Bohush.
Finding Supplies for Bohush
If you’ve already spoken to Aranka, she’ll provide most of what you need. However, look for Comfrey as well. You can buy it from the herbalist, Barnaby, or collect it yourself. For self-collection, head to Zhelejov. Fast travel there, cross the pond, and keep moving west until you spot Comfrey on the ground.
Locating Voivode’s Letter
After gathering the supplies, return to Marika and deliver them. Let her know about your deal with Voivode, assuring her you’ll only give him the letter in exchange for the amulet. She’ll then reveal the letter’s location.
Go to the coordinates marked on your map; the letter is hidden inside a tree on the west side of the P quest marker. Once you secure it, bring it back to Voivode and explain your arrangement with Marika.
Note: You have the option to hand over the letter to Voivode and bypass Marika, which will conclude the quest immediately.
Voivode will initially refuse to provide the amulet. While stealing it during his sleep is possible, it’s not the optimal resolution. For the best outcome, consult Tibor, who will mention Voivode’s penchant for gambling.
Achieving the Best Ending
Return to Voivode, and a new dialogue option will appear. Accept the wager, and if you win the horse race, there will be another opportunity to bet. Losing opens up the chance for three separate bets.
Note: Unless you have an incredibly fast horse early in the game, winning the race is nearly impossible.
If you win, the next bet will involve a fistfight against Tibor. This battle can be tough, as Tibor has surprising speed. Your best strategy is to remain patient. Focus on defending against his attacks with perfect blocks, parries, and ripostes. After landing hits, turn aggressive to ensure victory. If you succeed, Voivode will personally give the amulet to Marika.
If you lose the first round but win the second, you’ll face Voivode in a dice game. Don’t try to fight him directly; you’ll likely lose quickly. Instead, consult Aranka for a magical die she can provide you, which can turn the dice game in your favor. Ultimately, if you win, Voivode will return the amulet to Marika, welcoming her back to the camp.