Select Language:
As you navigate through the Indigo League in Pokémon FireRed & LeafGreen, you’ll find plenty of extra activities to keep you engaged. One of the most interesting methods to discover Pokémon and gain experience is the Safari Zone.
Located north of Fuchsia City, the Safari Zone in these games consists of several different areas that offer rare Pokémon you haven’t encountered yet. However, you’ll need to work within strict movement limits to catch them. Here’s everything you need to know about the Safari Zone.
How Does The Safari Zone Work?
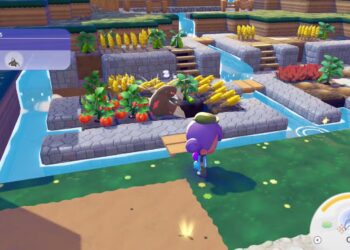
The Safari Zone is a unique area where you don’t battle Pokémon in the traditional way. Instead, you use bait, rocks, and Safari Balls to catch Pokémon roaming around. When you enter, you pay 500 PokéDollars to the attendant on the right or try to walk through the door on the opposite side of the room. Once inside, you’re given 30 Safari Balls, which are used to catch Pokémon, so no need to stock up beforehand.
While inside, the game keeps track of your steps, with a total of 600 steps allowed per entry. The steps begin counting as soon as you start moving, and once you reach 600, you’re automatically sent back to the entrance. You can see how many steps you have left on the pause screen, helping you plan your exploration. Feel free to walk, run, or even rotate your trainer without taking a step—rotating doesn’t count as a step, so you can trigger encounters repeatedly by just turning in the grass.
During your time in the Safari Zone, you’ll find that Pokémon may flee before you can catch them. Your behavior influences this: throwing bait will make Pokémon less likely to flee but harder to catch, while throwing rocks will startle them, increasing their chance to escape but making them easier to catch once you do. Every Pokémon has a base flee rate, which is their natural tendency to run. Throwing rocks doubles this flee rate, but it also boosts the likelihood of a successful catch if you manage to settle on a Pokémon.
The Four Zones of the Safari Zone
The Safari Zone isn’t just a single area. It actually consists of four separate zones:
- The Center Area, where you initially enter and start exploring.
- Area One, located east of the Center.
- Area Two, directly north but initially accessed from the west of Area One.
- Area Three, west of the Center, accessible via paths from Area Two or directly south from it.
Each zone offers varied terrain, including grass, water bodies for fishing or surfing, and paths that speed up your movement through the zone.
Additional Activities in the Safari Zone
Beyond catching Pokémon and logging entries, there are other activities. In Area Three, there’s a special house where you can earn valuable rewards. Reaching this house inside the zone grants you the HM move Surf, which is essential for crossing water surfaces in the game, allowing access to new areas.
To get there, you need to carefully plan your steps, since every step counts. Once inside, speaking to the house’s inhabitant will reward you with the HM for Surf. Remember, you need the Fuchsia City Gym badge (the Soul Badge from Koga) to use Surf outside of battle.
Near the house, you’ll also find the Warden’s missing Gold Teeth — located on the ground in Area Three. You’ll notice these teeth resemble a regular Poké Ball. To find them, keep walking south from the house and follow the path away from the house itself. Giving the teeth to the Warden in Fuchsia City will grant you the HM for Strength, allowing Pokémon to move large obstacles.
Pokémon Available in the Safari Zone
The Safari Zone features different Pokémon depending on the area.
In the Center Area, you’ll encounter Pokémon like Parasect, Venonat, Rhyhorn, Chansey (rare), Scyther (FireRed only), and Pinsir (LeafGreen only). Rarity is indicated with an asterisk (*) for especially rare Pokémon.
In Area One, you’ll find Pokémon such as Paras, Parasect, Doduo, Kangaskhan (rare), Scyther (FireRed only), and Pinsir (LeafGreen only).
In Area Two, the Pokémon include Paras, Venomoth, Rhyhorn, Chansey, and Tauros (both rare).
In Area Three, you’ll see Venonat, Venomoth, Doduo, Kangaskhan, Tauros, and other Pokémon like Nidorina and Nidorino, which can be version-specific.
The game also features Pokémon that can be encountered through fishing at various bodies of water in the Safari Zone, such as Magikarp and Poliwag, with the likelihood depending on the rod you’re using.
Entrances and Step Management Tips
When inside, your steps are tracked, and reaching 600 steps ends your session and kicks you back to the entrance. You can monitor remaining steps on the pause menu. Use your steps wisely; there’s no time limit beyond the 600-step quota, so explore thoroughly.
A popular tactic to extend your playtime is to rotate your trainer in the grass, which counts as a step during encounters but doesn’t consume your step limit, allowing you to repeatedly trigger Pokémon encounters without moving forward.
Summary of the Zones
The Safari Zone contains four main zones, each offering unique terrains and Pokémon:
- Center Area – Starting point, various Pokémon.
- Area One – East, with specific Pokémon.
- Area Two – North and initially accessed west of Area One.
- Area Three – West of the center, with the house that grants Surf and the location for finding the Gold Teeth.
Overall, the Safari Zone provides a different style of Pokémon catching, emphasizing patience and strategy over battling, making it a fun and rewarding experience in the Kanto region.