Select Language:
Norse: Oath Of Blood can be overwhelming as you progress, with a lot of information to take in. The best approach is to keep things simple, enjoy the story as it unfolds, and plan your strategies carefully.
To give you a strong start and increase your chances of building a successful community to avenge your father’s death, here are some beginner tips.
### Keep Watch For Interesting Items
While guiding your group along dirt paths or through forests, you’ll find crates, barrels, and bags containing loot. These can hold useful resources like wood, leather, or even treasure. Items will appear as you get close, but to avoid missing anything off the path, regularly use your highlight feature.
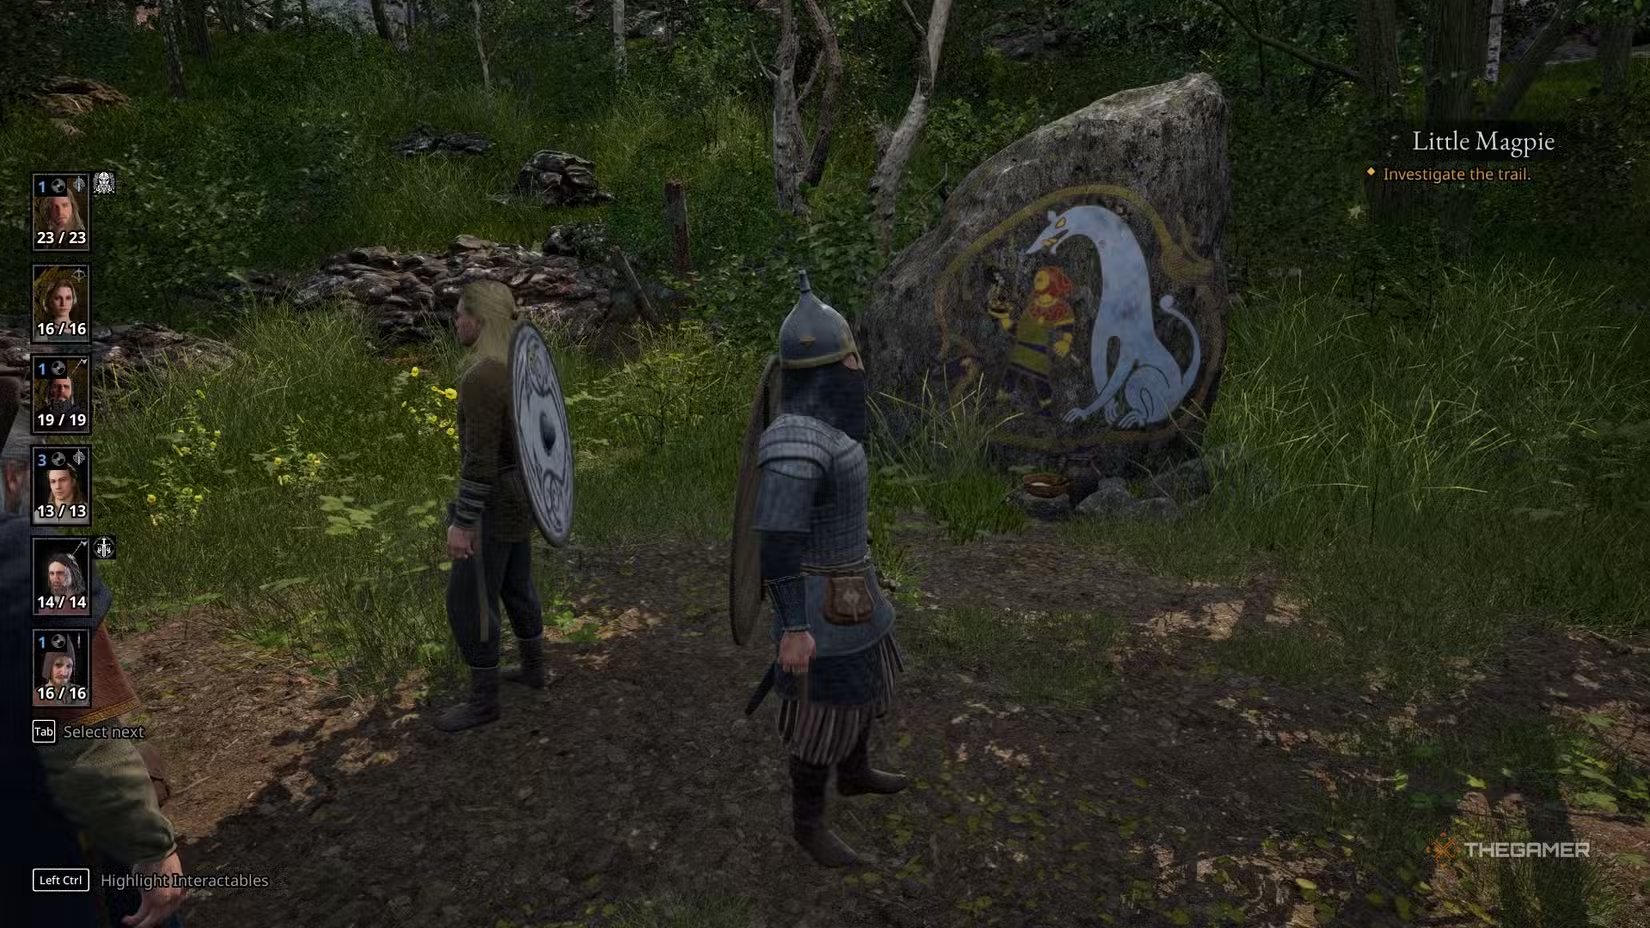
Using a controller makes it easier to stay alert while running. Containers such as barrels and bags show up clearly when highlighted, but things like hoof prints, droppings, or Runestones are more subtle. Keep a close eye for those. Runestones are big, painted stones, so if you miss the highlight, you can spot them by their distinctive colorful carvings.
### Boost HP With Berries
Highlighting during your run may reveal berry bushes or dried meat in the woods. Initially, your team should be at full health, so you won’t need to eat these right away. But after exploring side paths or encountering wild animals like wolves or boar, your health could drop. Remember where these food sources are so you can return to them afterward to heal injured members. When healing, check each team member and use your resources on the one most in need of health, rather than wasting food on someone only missing a point or two.
### Zoom Out
While exploring or fighting, it’s best to zoom out to see more of your surroundings. This helps you spot enemies, loot drops, berry bushes, animal footprints, and loot locations away from your main path. It also reveals side paths where you might find more resources or Runestones, or avoid fights if your team is injured. During battles, zooming out allows you to see the entire scene at once, including enemies hiding behind hay or boxes. This can prevent you from missing opportunities for easy attacks or being caught off guard.
### Get The Perfect Formation
Before entering a fight, deploy your units in the best formation. Take your time to review your team’s abilities and weapons. Position your strongest, healthiest units at the front, with weaker or ranged units like archers behind them. Archers can be placed behind walls or hay bales to shoot over obstacles and stay safe. Proper formation gives you a clear advantage and can turn the tide of battle.
### Check For Dropped Weapons
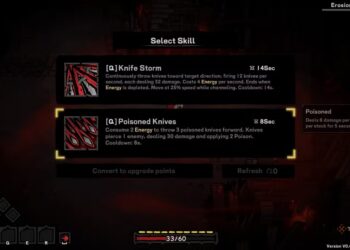
During combat, use your highlight feature again to find items like spears, axes, or rocks that enemies leave behind. Picking these up can give you new ways to attack. For example:
– Throwing a spear can do 2-4 damage, causes bleeding, and pushes enemies back one tile.
– Throwing an axe deals 2-4 damage, breaks armor, and also pushes back enemies.
– Throwing a rock causes 1-3 damage and has a chance to daze enemies, stunning them temporarily.
### Don’t Skip Cutscenes
Norse: Oath Of Blood tells a compelling story with many cutscenes, brought to life by talented actors. These scenes include memorable moments, humor, character interactions, and important plot points. Missing them would take away from the game’s atmosphere and depth. Keep an eye on the story and enjoy the small details, like the “News & Hearsay” updates after missions, which add flavor to the game.
### Prioritize The Right Projects
Building and upgrading your village is crucial for progress. Focusing on key projects boosts your village’s reputation and resource income. Investing in trade, crafting, and resource generation allows you to invite villagers with essential skills. Recommended initial projects include:
– Sweat Lodge
– Village Market
– Large Dock
– Fishing Stations
– Huntsman Dwelling
### Loot Before You Leave
After a tough battle, resist the urge to leave immediately. Take time to explore the area thoroughly. Collect berries, find nearby Runestones, and loot corpses for valuable tokens, weapons, and armor. Leaving enemies and bodies unlooted might mean missing out on rare items or upgrades that can help you later.
### Trade Skillfully
Trading unlocks once you reach turn 16. Use this feature to buy, sell, and recruit allies. Be patient and strategic, carefully checking what each ally needs and what they have to trade. Balance your resources to avoid wasting your money—offering items that others demand and making deals that benefit both sides. You can buy or trade items with multiple allies to get what you truly want and improve your village’s strength.